Building a visually appealing slideshow is essential to a successful presentation. If you’re trying to create a unique appearance with pictures and objects, you may want to bring an image to the front of the other slide elements to make it the star.
We’ll show you how to bring an image forward in Google Slides along with how to put it right in front. For an eye-catching presentation in less time, we’ll also explain how Plus AI is the ideal tool.
{toc}
Bring Forward versus Bring to Front in Google Slides
Google Slides has two arrangement features which may seem similar but are different when you have layers of elements on your slide. These are Bring Forward and Bring to Front. Before you decide which one to use, it’s important to understand the difference.
Here we have three elements on our slide: an image in the back, a black rectangle in front of that image, and a yellow circle in front of both.
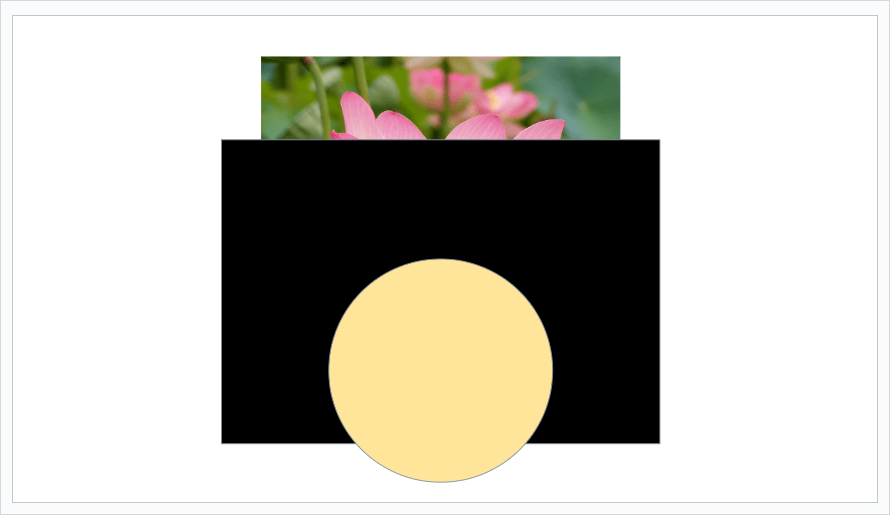
If you choose Bring Forward for the image, this places it in front of the rectangle but behind the circle.

If you choose Bring to Front for the image, this places it in front of both objects.

When you only have two elements on the slide, Bring Forward and Bring to Front appear to act the same way. It’s when you have more than two that you’ll notice the difference as shown above.
Note: The order in which you add the elements to the slide determines their initial order.
How to bring an image forward in Google Slides
Now that you know which arrangement feature to use, here’s how to bring the image forward on your Google Slide. The process works the same for other slide elements too such as shapes, text boxes, and symbols.
Select the image or other object and do one of the following:
- Right-click, move to Order, and pick Bring forward or Bring to front.
- Pick Arrange in the menu, move to Order, and pick Bring forward or Bring to front.
- On Windows, use the keyboard shortcut Ctrl + Up arrow to bring the image forward or Ctrl + Shift + Up arrow to bring it to the front.
- On Mac, use the keyboard shortcut Command + Up arrow to bring the image forward or Command + Shift + Up arrow to bring it to the front.

Tip: If you want to move your image forward but change the opacity or bring your object to the front and adjust the transparency, check out our helpful guides.
Build Presentations Effortlessly with Plus AI
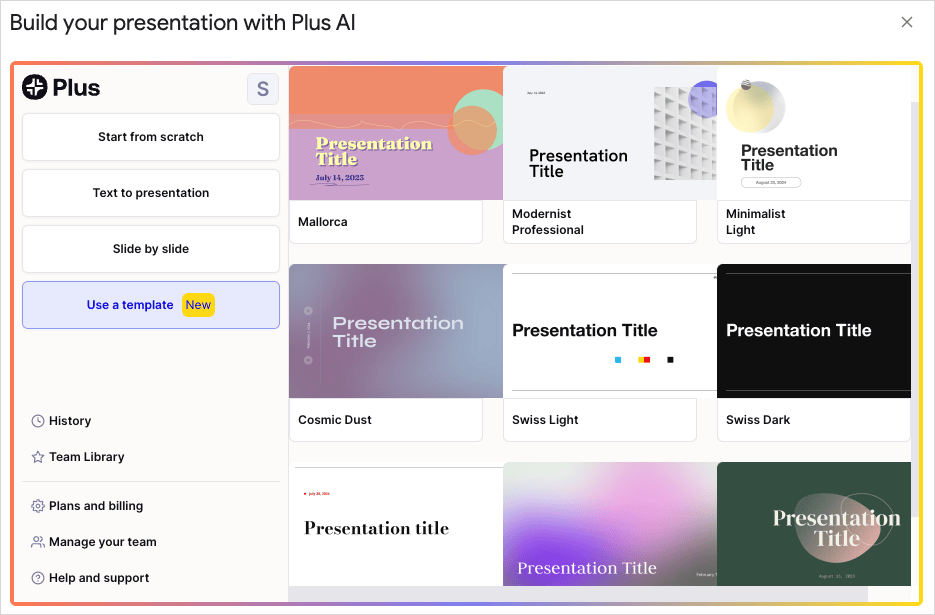
We can’t all be talented designers and even though Google Slides offers some assistance with the appearance of your slides, it can still be time-consuming. With Plus AI for Google Slides and Docs, you can create gorgeous and effective presentations from start to finish, and with little effort.
You can build your slideshow by uploading a file or entering text and then choosing a template. Plus AI not only gives you a distinctive variety of slide styles and layouts, but automatically adds your content in a well-structured and easy-to-present format.
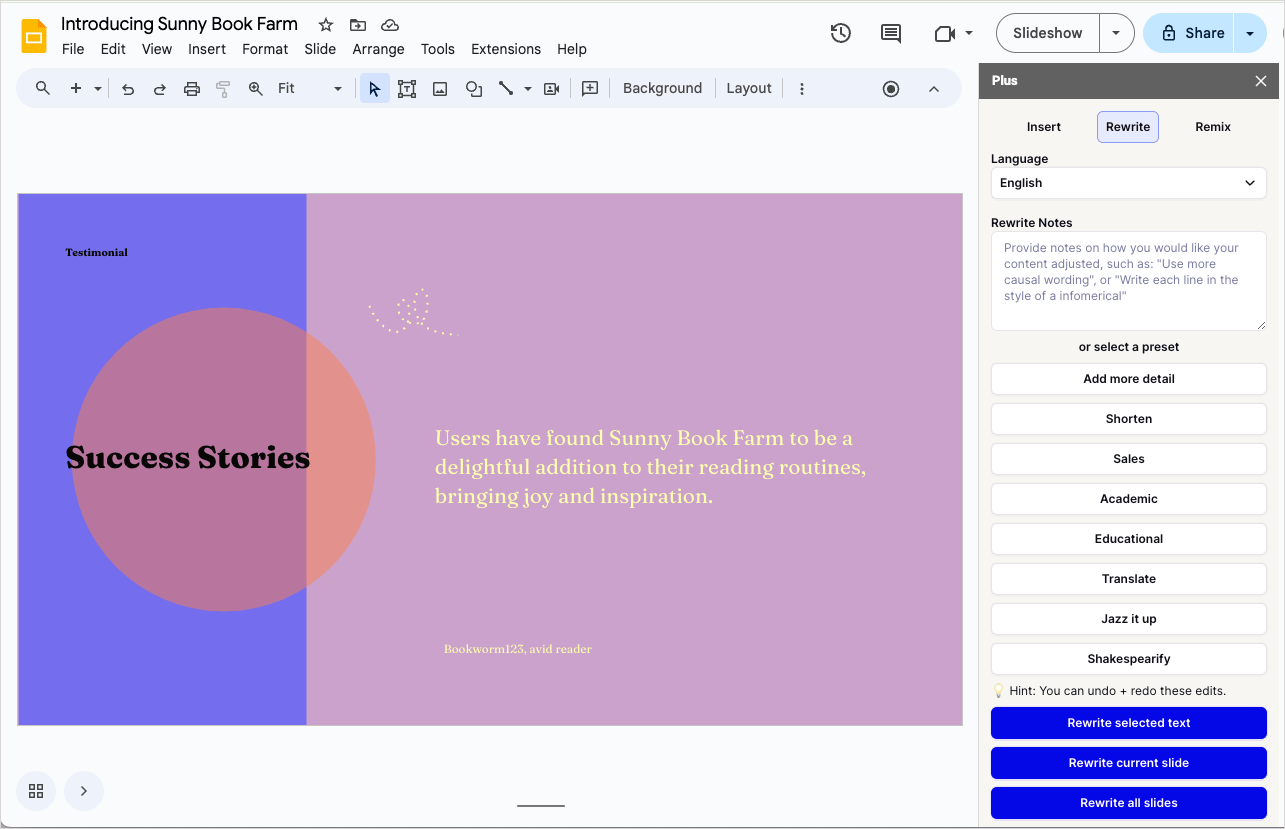
Once you have your slideshow, you can also use Plus AI to make adjustments and insert more slides for content you discover you need later. Just tell Plus AI what you want and its artificial intelligence delivers.
For the complete package, check out the Plus AI feature set and try out the tools with your free trial.
Conclusion
Organizing slide elements like images, shapes, and other objects is an essential part of your presentation’s appearance. So, take a little time to experiment with different arrangements to get just the right look using the built-in Google Slides features or Plus AI’s attractive templates and themes.
FAQs
How do you bring an image to the front in Google Docs?
You can align or order images in Google Docs in relation to the document text. To bring an image to the front, select it and click the In front of text button in the floating toolbar. This then places the image on top of the text.
How do you put a picture behind another in Google Slides?
If you want to move a picture behind another picture or other slide element in Google Slides, start by selecting the image you want to move. Then, either right-click or open Arrange in the menu. Move to Order and pick Send backward.
How do you send a picture to the back in Google Slides?
Maybe you want to put your picture in the back of all other elements in Google Slides. Select the image, either right-click or open Arrange in the menu, move to Order, and pick Send to back.